
November 7, 2025: A lot of content this week in the digital voice radio realm, plus a dive into a 2020 iMac with 27″ Retina display, and my new eyeball card about amateur radio.
Short Stack
The Short Stack consists of tidbits pulled from many sources.
-
Converting the shack computer to Linux: part 1 (QLog), part 2 (Andy’s Ham Radio Linux), part 3 (Not1MM, WFView, and FLdigi)
-
Zero Retries 0226: LinHT Article (by the developers), MESHCON 2025 is a Wakeup Call, Test Bench in a Hand, N8GNJ Standby Battery System, direwolf 1.8, New AllScan USB Radio Interfaces, MMDVM Update
-
PocketPD: The ham radio accessory I didn’t know I needed. Also see: Palm-sized PocketPD USB-C programmable power supply delivers up to 21V/5A output (Crowdfunding)
-
DMR Tech Net TV Episode 23 with Ben VE2VB about the BrandMeister website, selfcare, and hoseline
-
No Holes Roof Mount Antenna Mounting without Roof Penetrations
-
Alan Roe’s B-25 Season Guide to Music on Shortwave (version 1.0)

Add AmateurWire to your SIP phone
A subscriber with a phone similar to mine reached out for some help with his AmateurWire setup, causing me to realize it’s been a while since I touched on AmateurWire. I’ve mentioned AmateurWire in Random Wire issue 122 and issue 139, but it’s been a while since I detailed how to implement this VOIP service on your SIP phone. Since those issues, I’ve moved a SIP phone to a new location with a new LAN, so I needed to fix my own AmateurWire instance.
Background: what is AmateurWire?
What is AmateurWire?
AmateurWire is a VOIP service for Hams which also works with the Hams Over IP service. Users of both services can call each other.
From the AmateurWire home page:
Welcome to AmateurWire.org the home of the AmateurWire VOIP Service. If you are not already registered come join us. Our service works with desktop IP phones, Softphones on PC, MAC and Smart Phones. You don’t have to have an IP phone to use our services.
I also offer some other services such as email addresses from the AmateurWire.org domain so if you would like YOURCALL@AmateurWire.org for an email address once you have registered just submit a support ticket and we can get you set up.
Implementing AmateurWire on a Poly SIP phone
The following information applies directly to a Polycom VVX 401 SIP phone, but the information can be generalized to apply to many SIP phones. I added my Amateur Wire account 1479 to line 2 of my Poly VVX 401 phone. Here are the settings that are working for me.
On the Polycom VVX 401, log in using the IP address of the phone on your network. The default admin password is 456, important to know if you have to do a factory reset of your phone.
To find the IP address of the phone, press the Home button on the phone, then use the round rocker switch to navigate to Settings. Then Status, Network, and TCP/IP Parameters. This will display the phones IP address.
Use your computer’s browser to jump to the phone’s IP address. You’ll see a login screen:

After logging in, navigate to Settings, then Lines:

I am configuring Line 2 for AmateurWire. One of the things I discovered about the Polycom VVX 401 is that you can’t have an empty line preceding the one you are configuring. My Line 1 is configured for Hams Over IP, so line 2 was the next available line on my Poly phone.
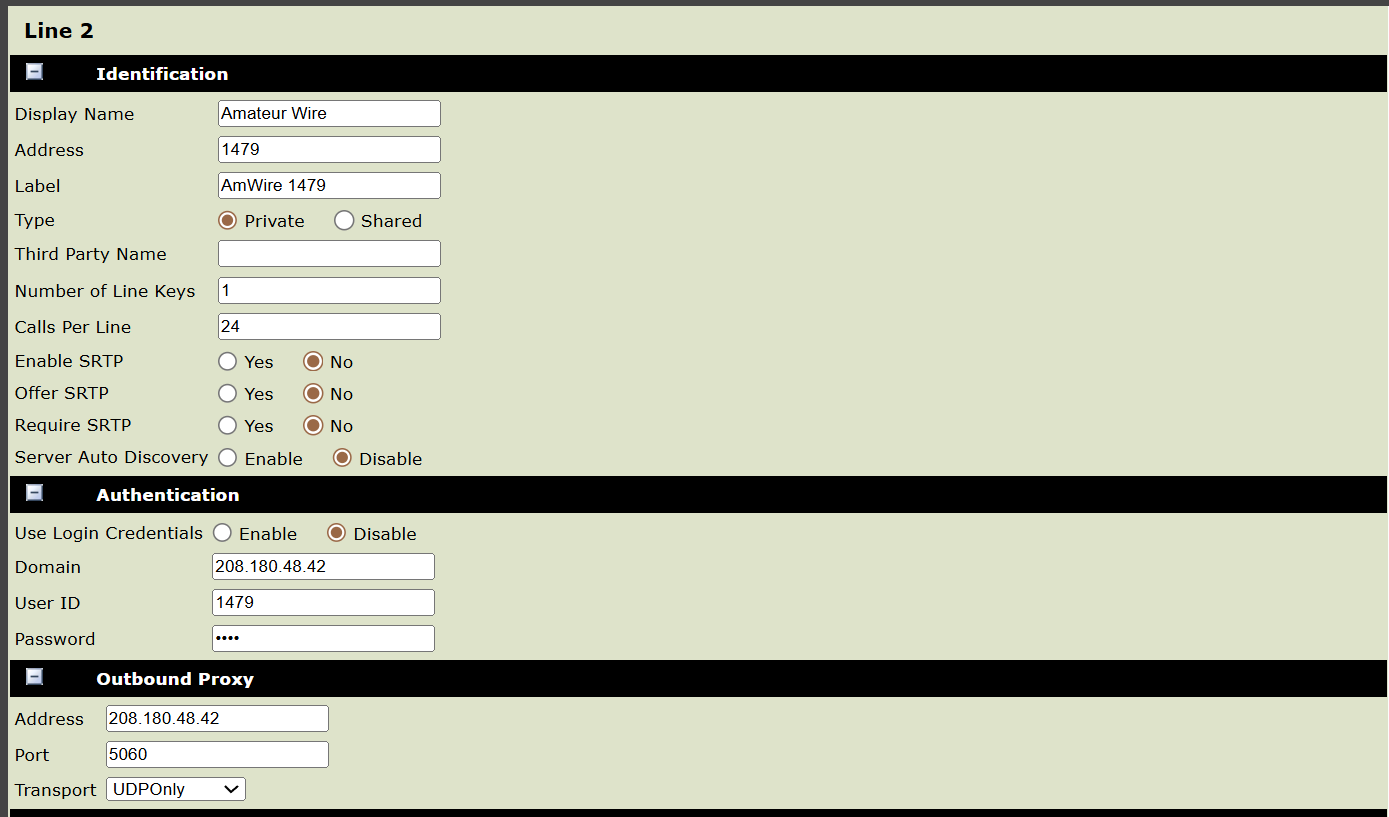
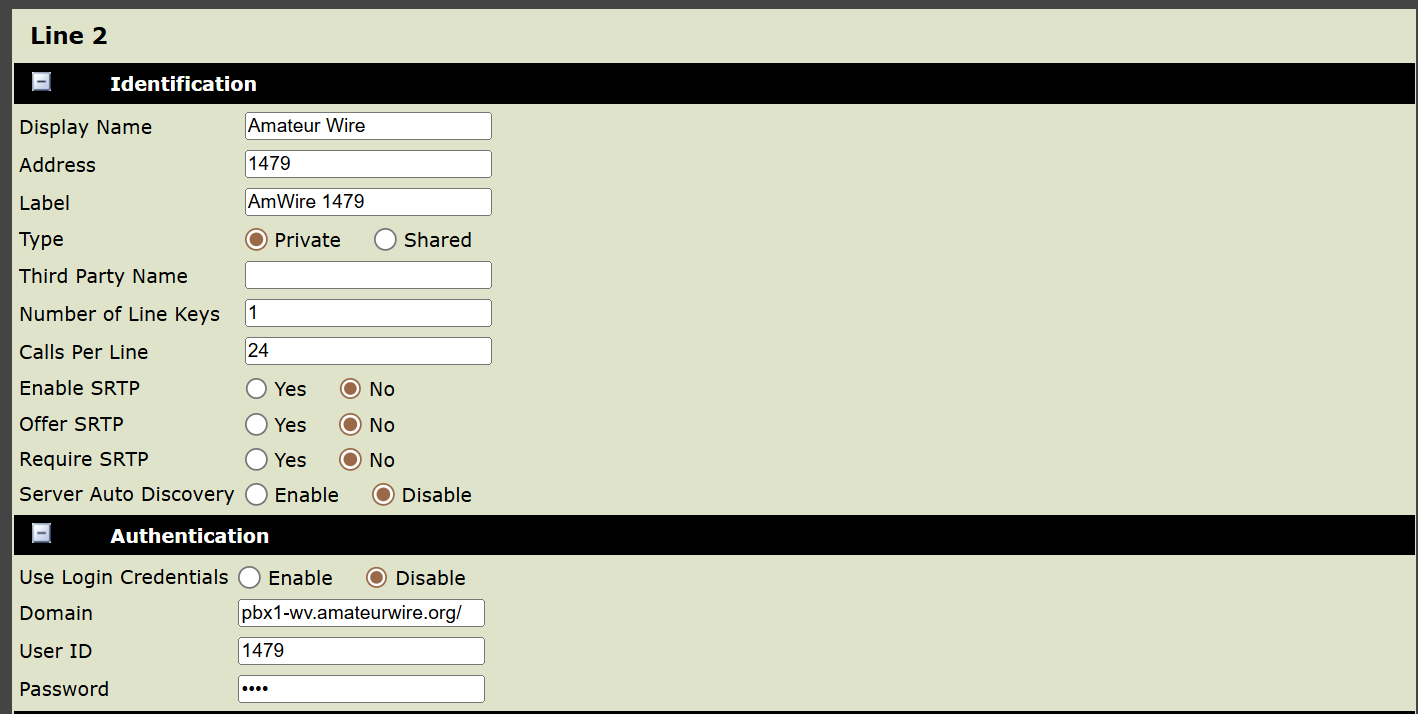
The domain address can be pbx1-wv.amateurwire.org or the IP address of 208.180.48.42. I was having trouble at first with the domain address but now that the phone is working, I’ll probably change the IP address entries to the domain form.
Phone display
Here is what my two lines look like on the phone screen:

If there is a green circle with a checkmark in it, the line is working. If something isn’t right, it will be red.
Port forward not needed
I had also set up a port forward on my router and when I mentioned that to the person behind Amateur Wire, Roger Radcliff KE8LCM, he noted that I should not do that:
You do not need to forward port 5060 to your phone on your network as it is an outgoing connection. Forwarding port 5060 will open your phone up to people on the internet who can then do some strange things to your phone. It will begin ringing with no one on the other end, fake caller ID numbers and so on will show…. It is just not good. Close port 5060 and if you have any further issues look for a setting in your router called SIP ALG and make sure it is disabled.
This is excellent advice, much appreciated.
Additional services
Roger does a lot more than Amateur Wire. His interests in computing and technology pushed him to explore several other services. Visit https://ke8lcm.com/ to see what else he has built or provided. For example, check out https://hamcam.ke8lcm.com/ for video chat rooms for radio amateurs. I appreciate his willingness to explore these topics and to publicly provide resources for radio amateurs.
Roger does accept donations. I think it’s worth supporting his work, even if it is just to help maintain AmateurWire. Find his PayPal button in the right column on the AmateurWire home page at https://amateurwire.org/.
Beginning with the AnyTone AT-D878UVII Plus
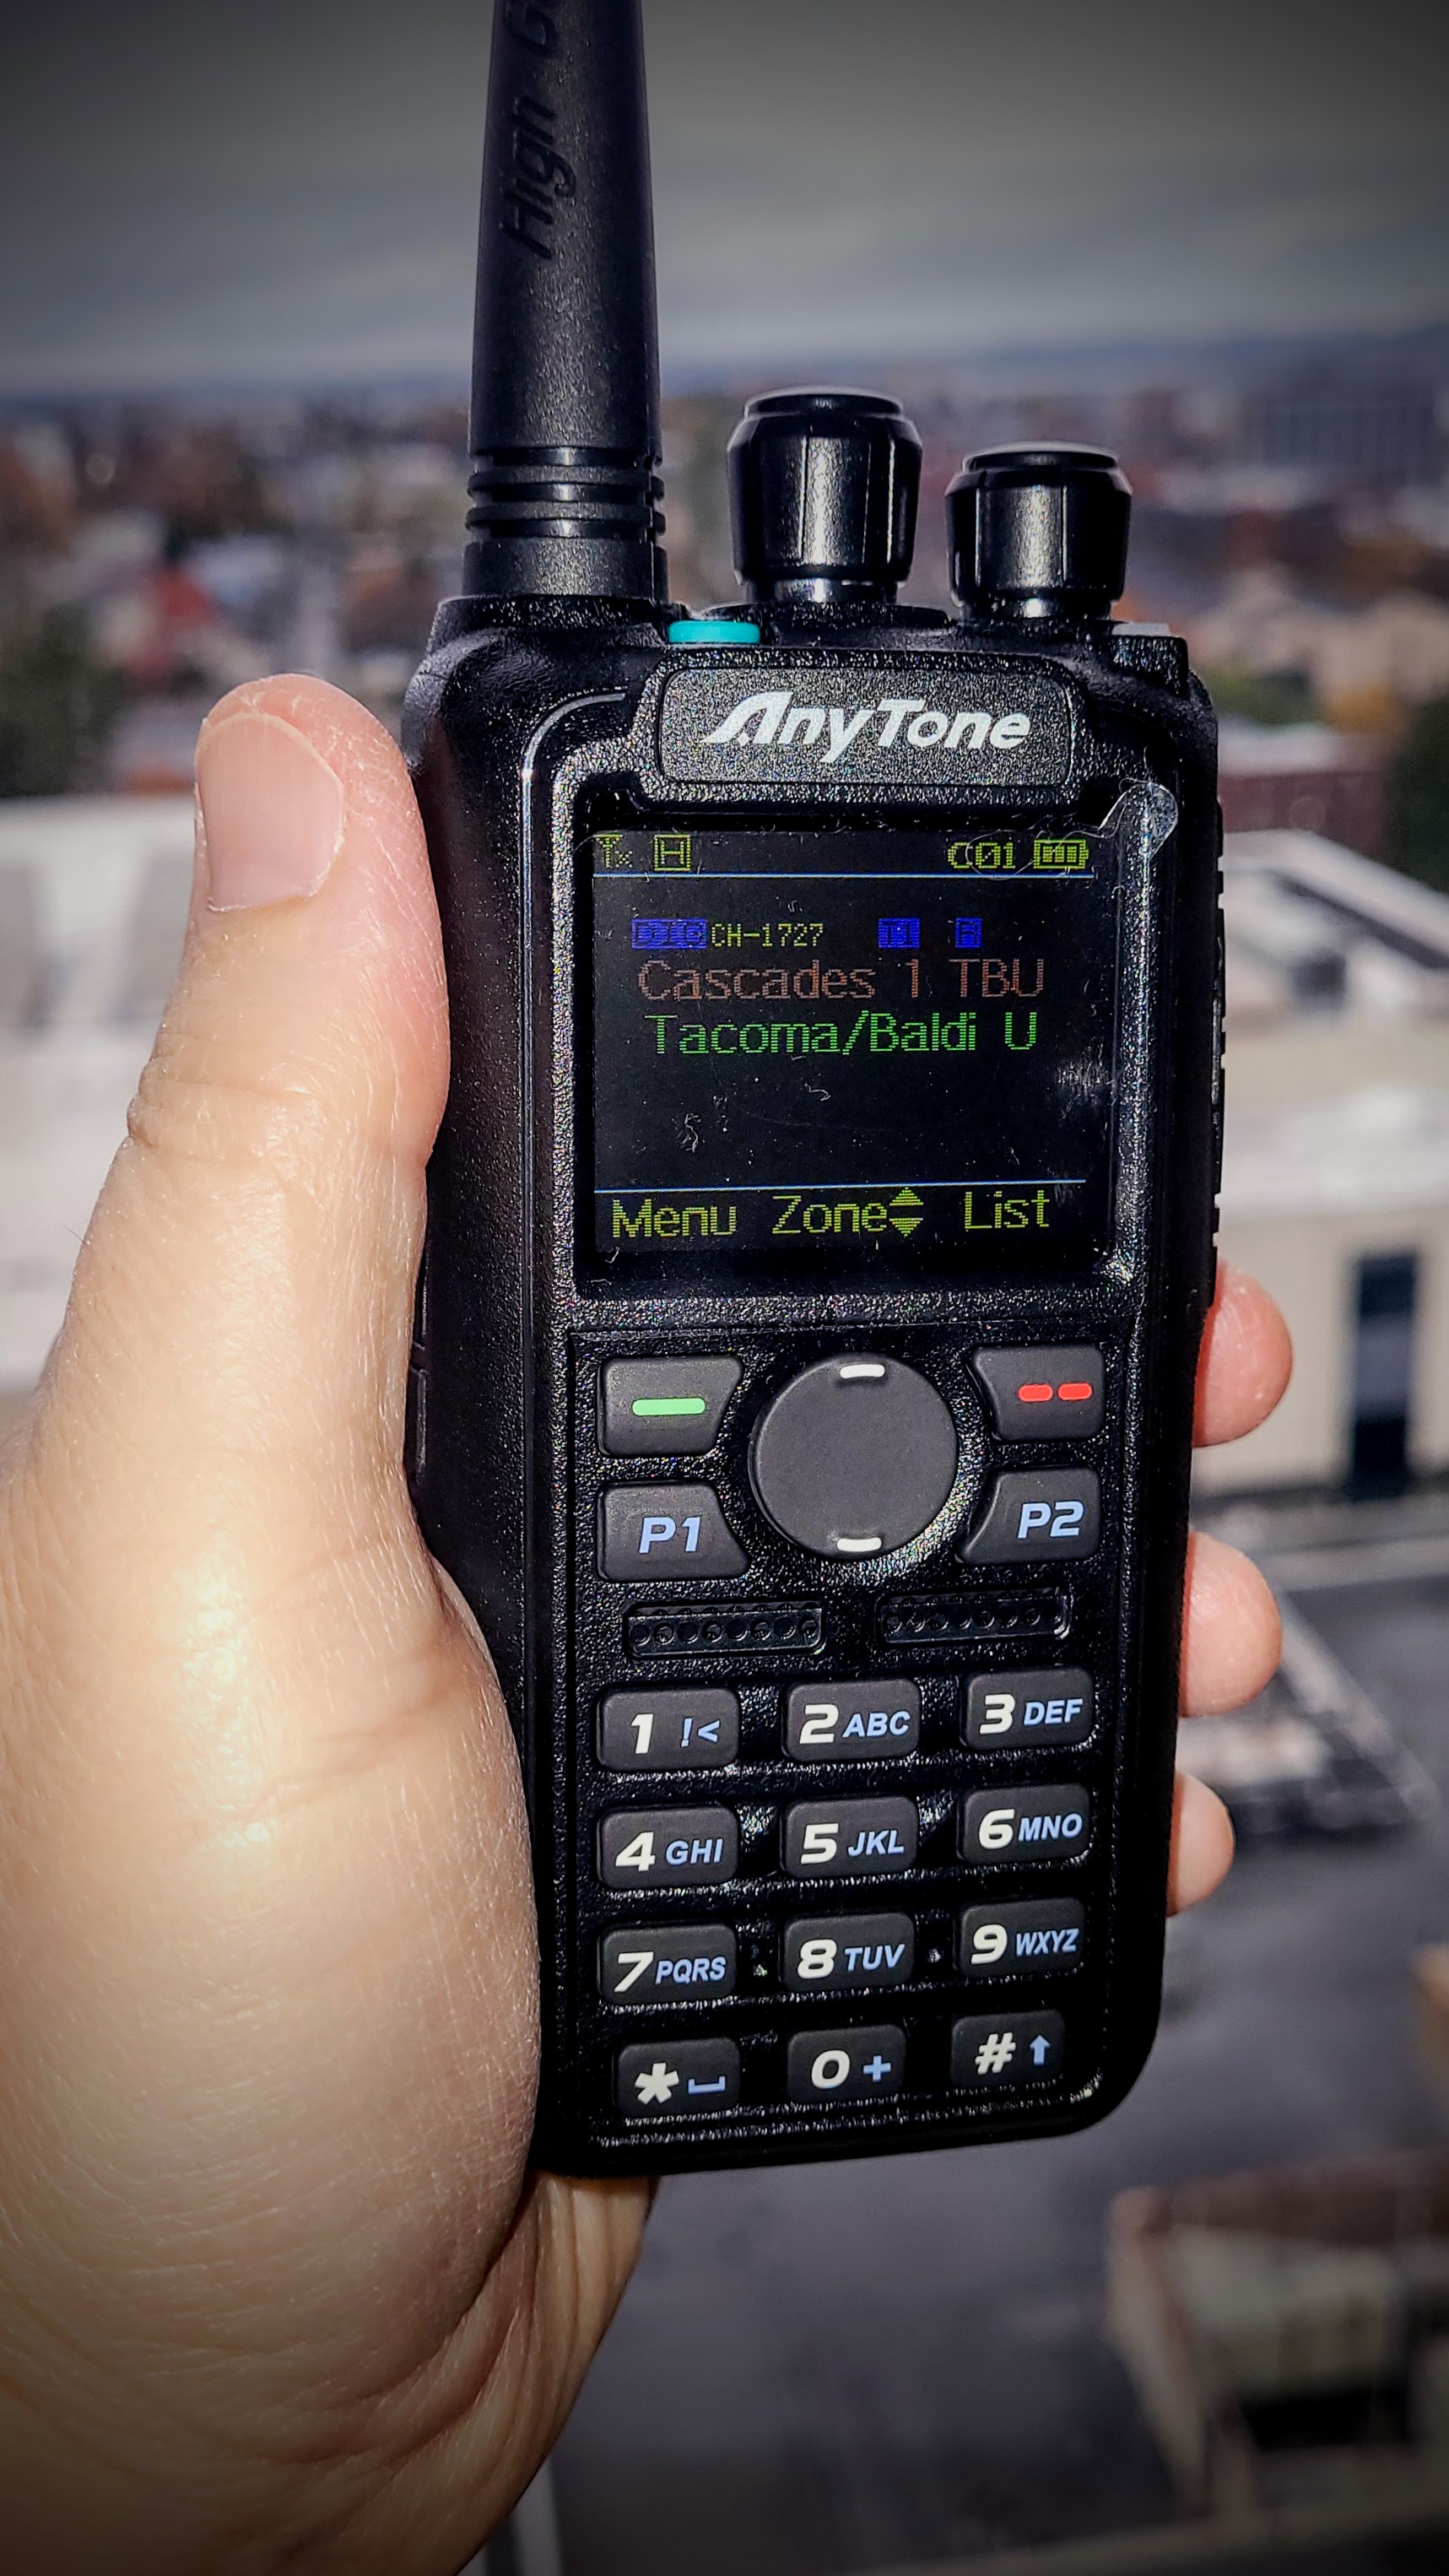
I’m a beginner with this radio. It’s taking me a while to adjust to it. It must be a DMR thing. I use the round rocker switch to select the Zone, then the channel selector (the rotary switch beside the antenna) to select the Talk Group. Maybe there is an easier way, but that is what is working for me.
I tested this from the 8th floor of the hospital parking garage and got a clean return from the parrot channel in the PNWDigital code plug, using the Mt. Baldi VHF repeater. So it works. You can also listen to your transmission on the Brandmeister Hoseline website to make sure your audio is coming through.
Installing the code plug was the biggest challenge, as noted in last week’s Random Wire edition.
As I get more familiar with the radio, I’ll report more.
One of the next things to do: configure the radio to work with one of my hotspots set to DMR mode.
M17 notes
Modification of the Talkpod A36plus radio
A36plus_mod on GitHub is a “modification guide for the Talkpod A36plus, enabling flat baseband input/output (so-called “9600 baud”). The stock firmware does not support flat baseband in/out, so it is required to flash the device with OpenRTX open-source alternative firmware.” They add the warning that this breaks the RX and TX paths in the radio, making the only access through the Kenwood K-1 connector.
M17 web client
Give the web client for M17 a try at: https://m17web.kc1awv.net
CC1200 boards are done, ready to ship here!
PCBWay emailed me a few days ago to let me know that fabrication of my five (minimum order) CC1200 boards is done. The boards appear to be ready to ship. Here’s what one looks like (photos from PCBWay):
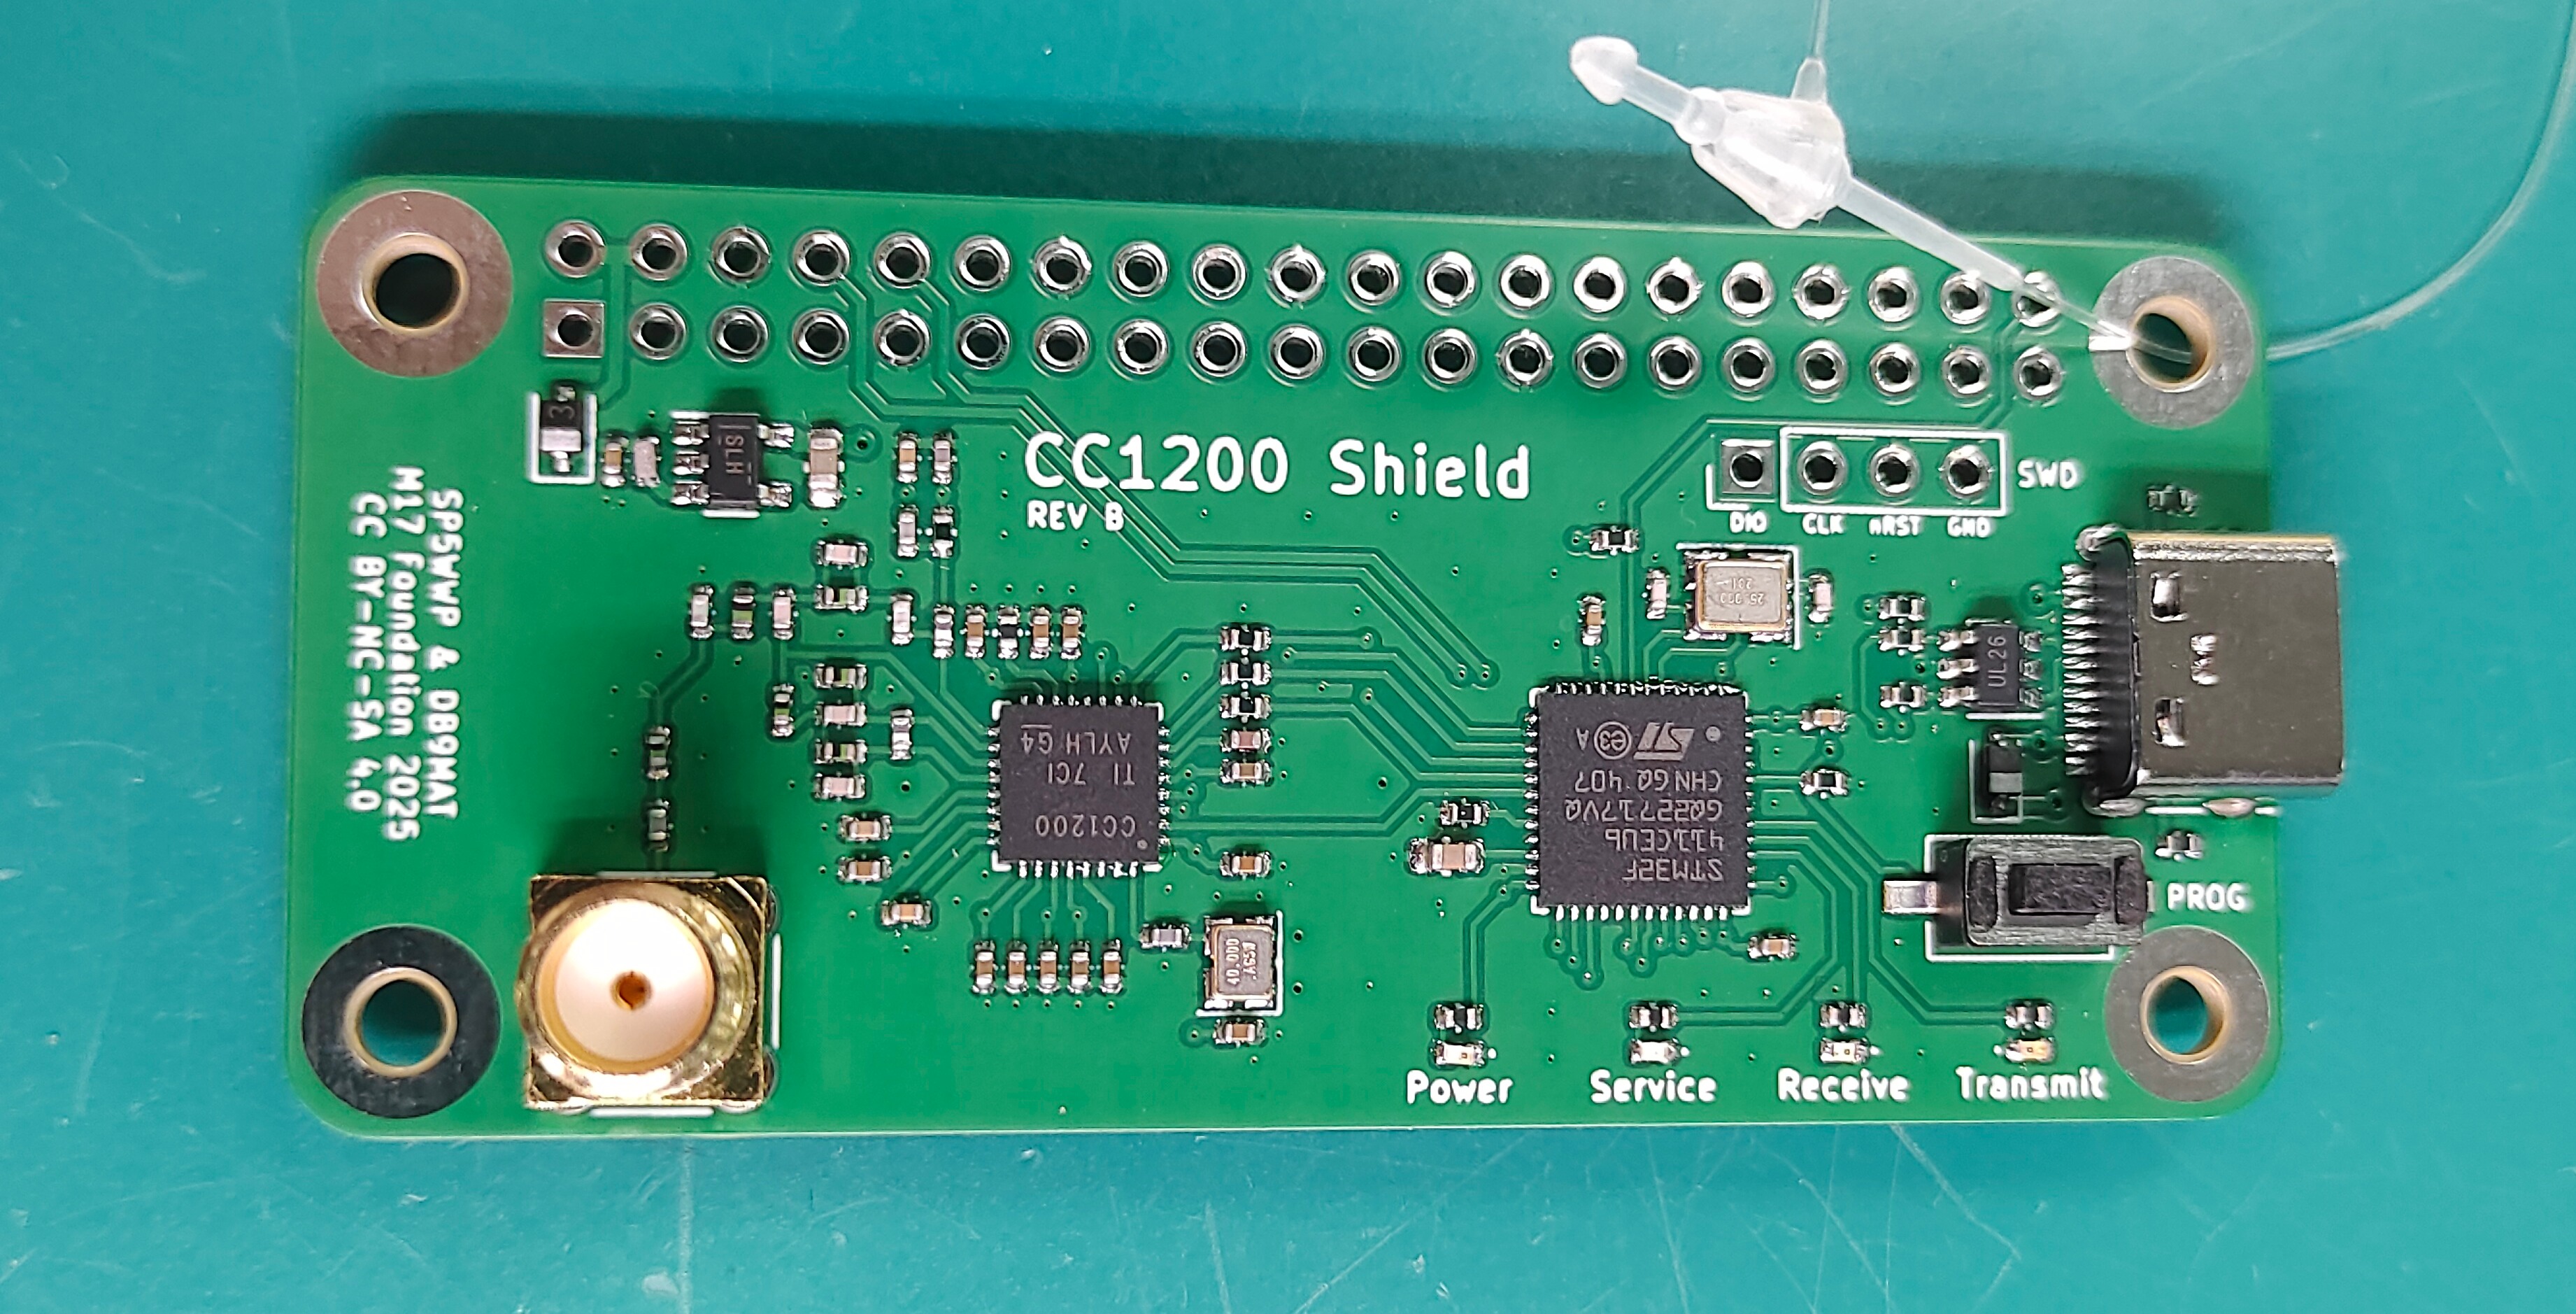
When I compare that to the design on GitHub it looks pretty good. If you’re curious, a Reddit thread has a photo of one mounted to a Raspberry Pi: https://www.reddit.com/r/amateurradio/comments/1afhwwg/cc1200_rpi_hat/
That same Reddit link also has a link to the firmware needed for the board to work.
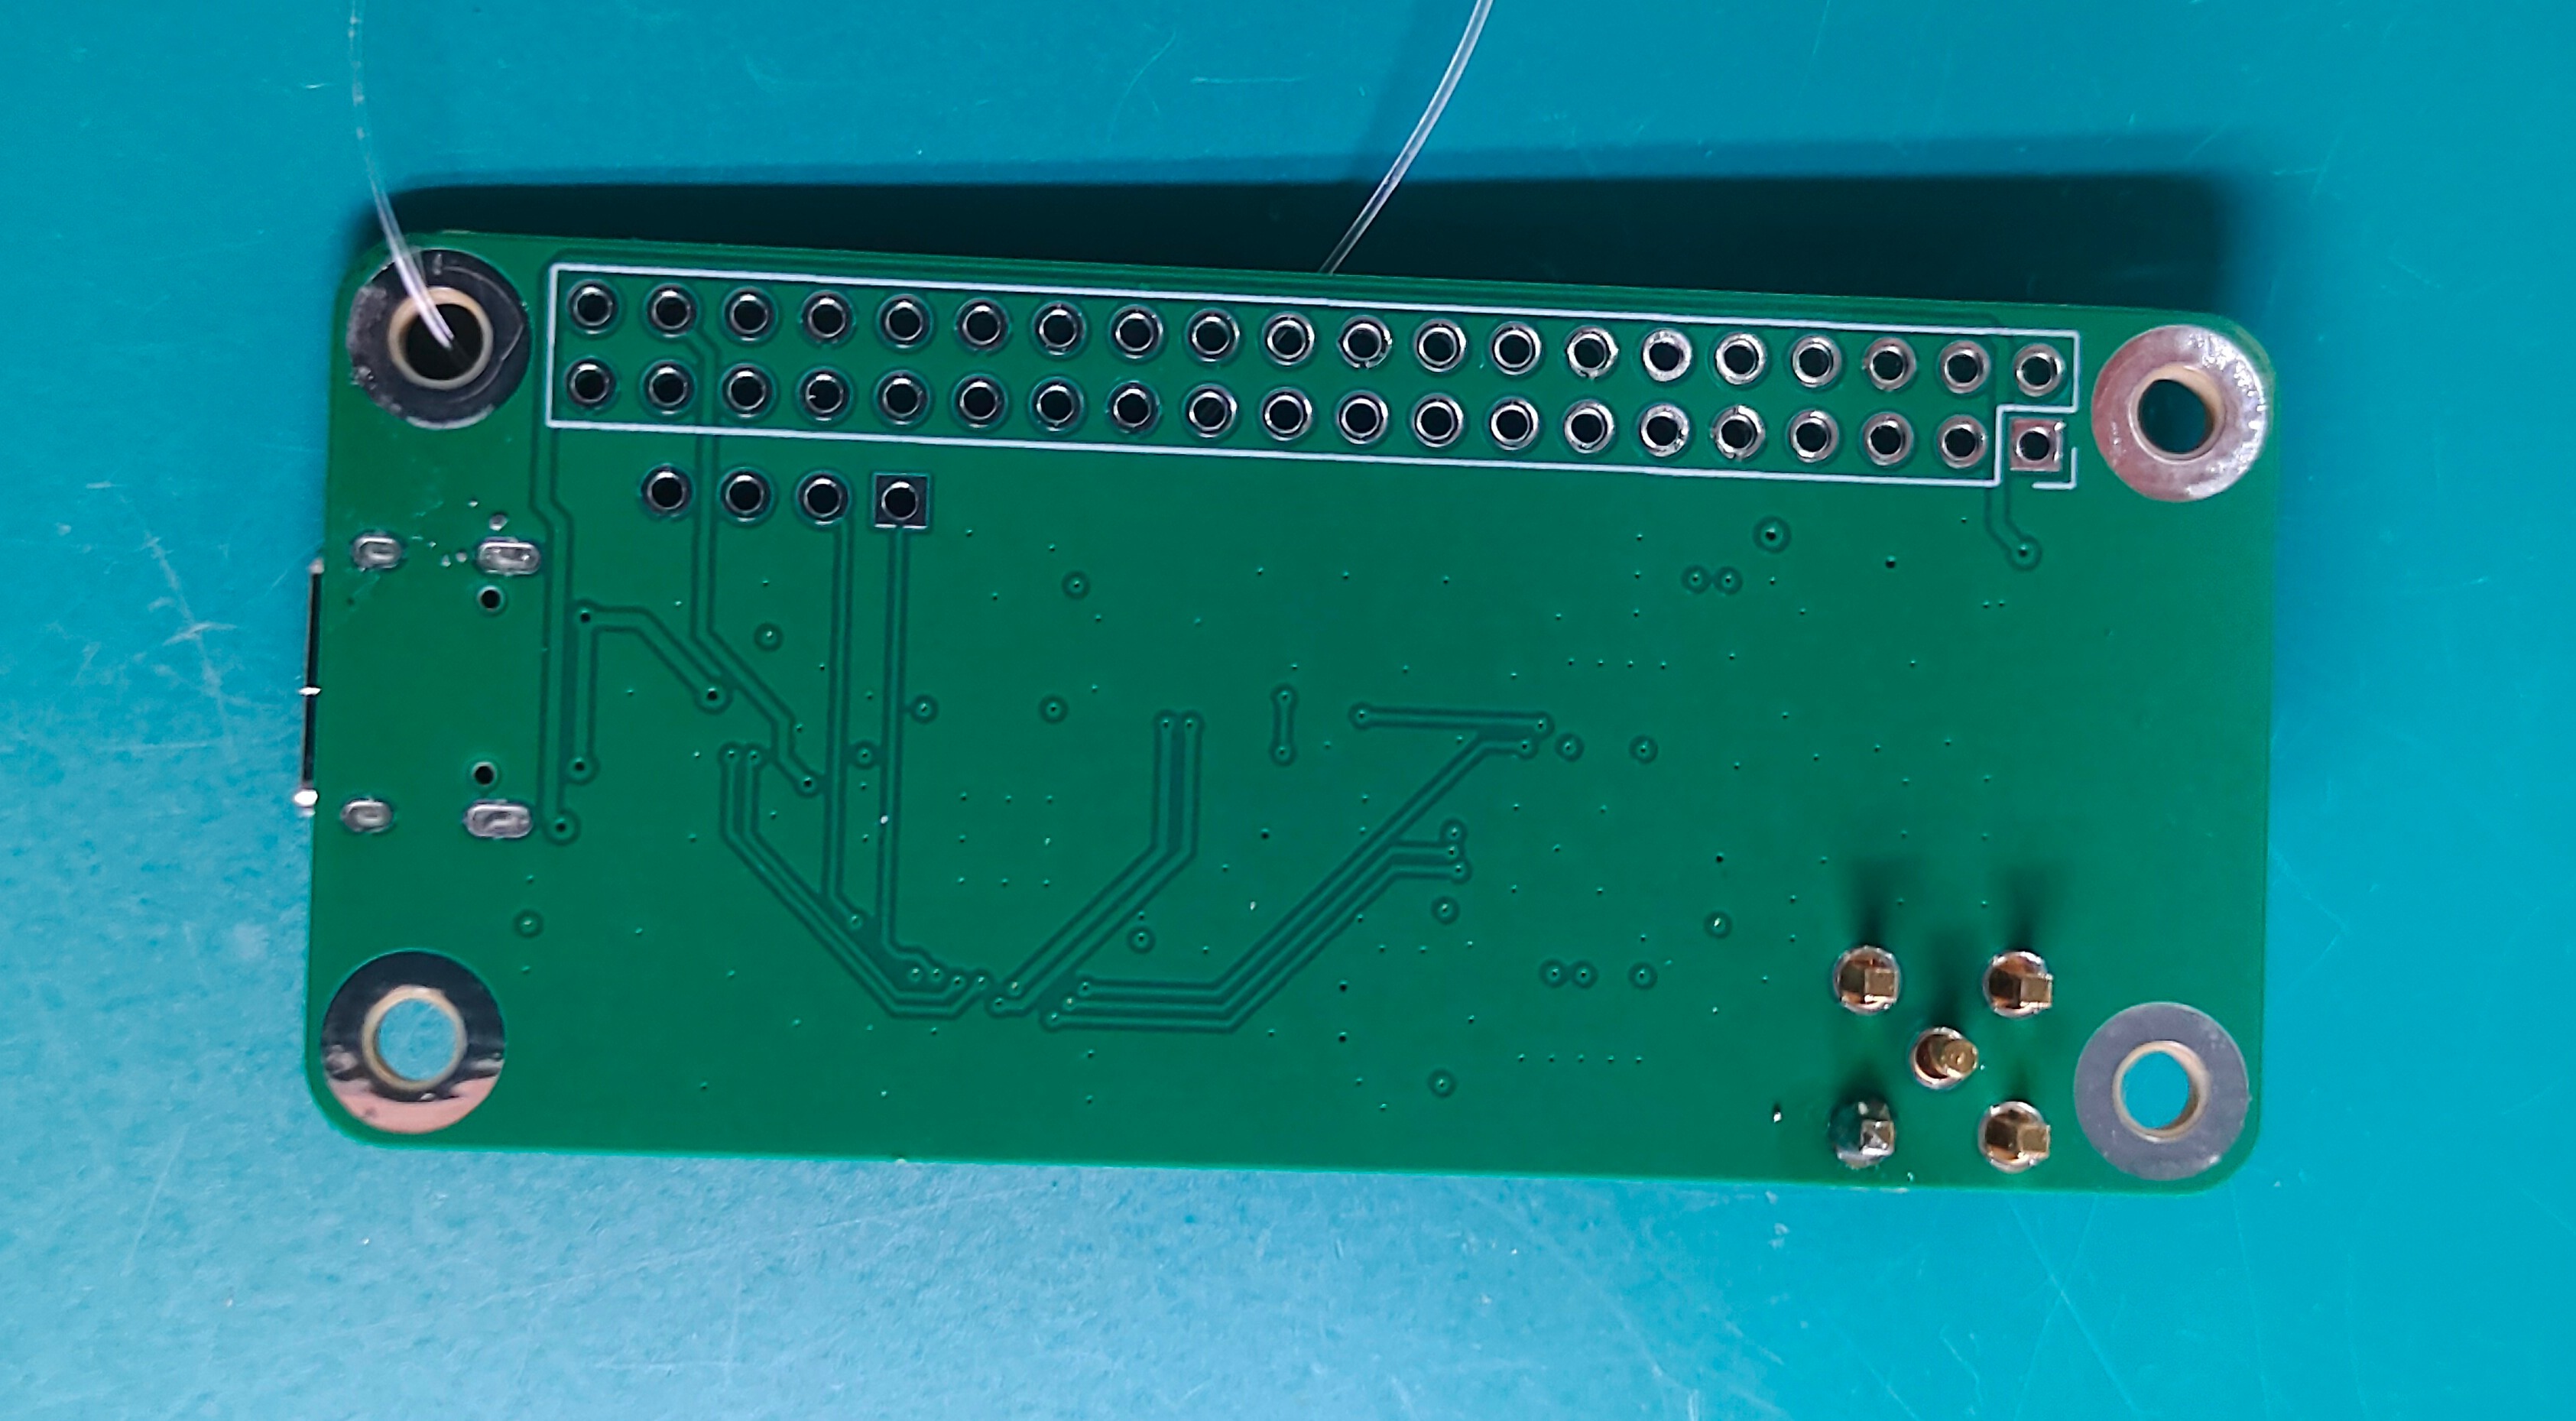
And they arrived late this week. They look good.

Here’s the back:

So now I have another project to work on!
DroidStar and DMR
As I’ve started playing with DMR, I also realized that DroidStar will allow sending and receiving transmissions without the need to have a DMR radio. If the cost of a DMR radio has been holding you back, do consider trying DroidStar.
Where to get DroidStar
I think the latest build for Windows is available at https://icssw.org/en/download/droidstar-fuer-windows-pc/. I’ll download this later because in the hospital, it shows as a multi-hour download!
Binaries (32-bit and 64-bit) are also available at https://dudestar.gw8szl.co.uk/Droidstar/.
I’ve also used the binaries from https://pizzanbeer.net but I see today that this domain name is expired, so I think that source is off the table.
UPDATE: It’s up at http://pizzanbeer.net/. Note that this is not an SSL-secured connection. Your browser may automatically try to make it an HTTPS connection, so you may need to manually edit that to HTTP.
How?
In DroidStar settings, make sure your callsign, DMR ID number, and Brandmeister password are entered. The ESSID should be something other than blank:
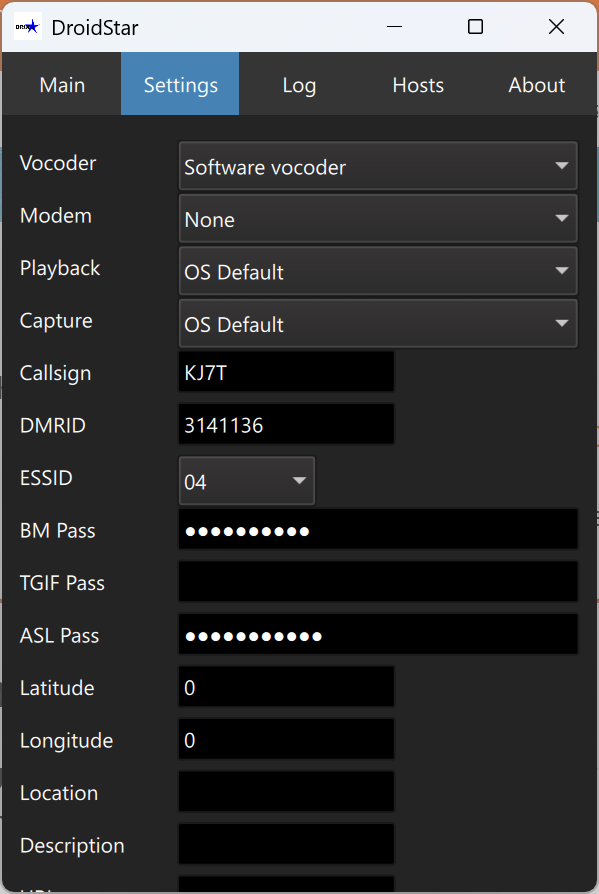
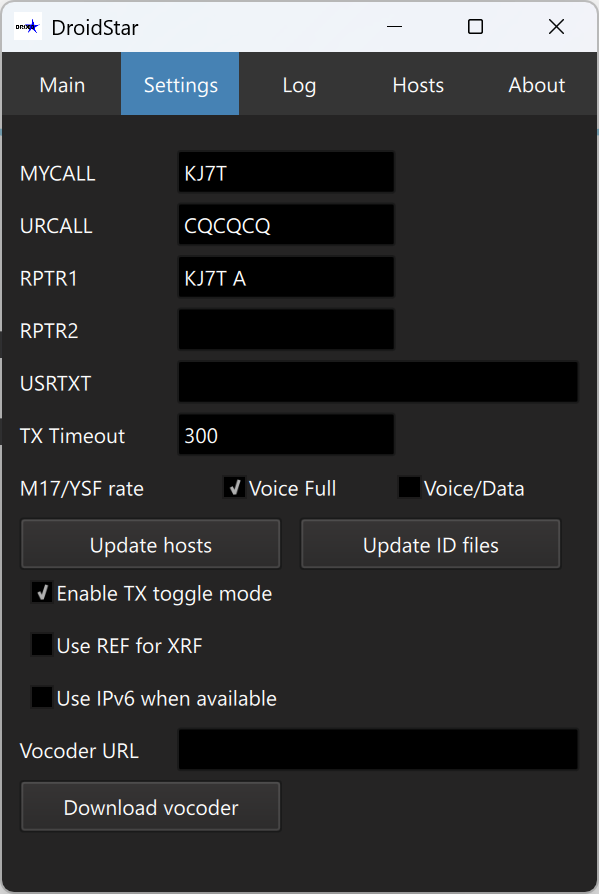
Then scroll to the bottom of the Settings screen and click the Update hosts button, then the Update ID files button.
Time to connect to the DMR network
Now you’re ready to connect to the DMR network. Go to the Main screen in DroidStar and select DMR as the mode. For the United States, select BM_3102_United_States as the host.
You can select time slot 1 (S1) or timeslot 2 (S2). This will vary by talkgroup. Now you need to select a talkgroup and enter the TGID in the correct field. You may need to try different color code settings. Below, I’m connected to Brandmeister 3102 and Talkgroup 103153 for Washington State:

To find an active talkgroup, consider monitoring the Brandmeister Hoseline at https://hose.brandmeister.network/. You can also see a list of talkgroups at https://www.pistar.uk/dmr_bm_talkgroups.php.
I also found a good video guide on using DroidStar on a Windows PC:
D-STAR quick start guide
I don’t want to leave D-STAR out of this issue. Shared by Bucky W0SUN on the Colorado HD Digital Learning Net on Wednesday evening was a link to a quick start guide to D-STAR. Find it at: https://www.roblocher.com/whitepapers/dstar.html
If you’ve been wondering how D-STAR works, the quick start guide will probably clear things up for you. Good stuff.
(And I learned during the net that some nets are available as recordings at https://ndr.hamradio.solutions/ndr, but they aren’t available for very long after the net closes. This is useful if you missed something during the net and want to hear it again.)
iMac computer #2 arrived
A new-to-me iMac arrived this week with a gigantic 27-inch Retina screen. The big monitor on this all-in-one computer will be helpful in my computer work. It was well packed:

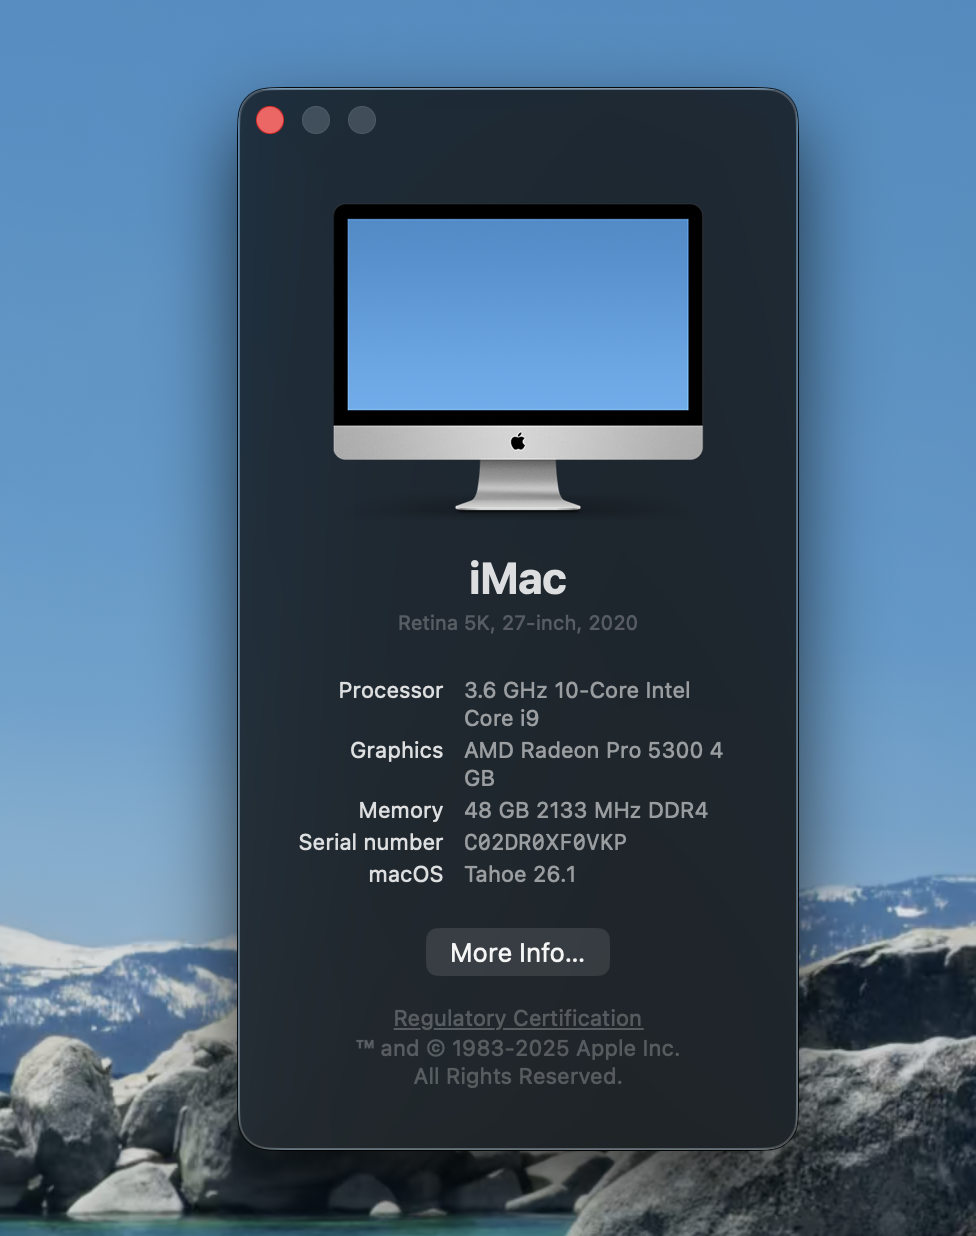
This device is the replacement for the iMac that was shipped to the wrong address a few weeks ago. I was issued a refund for that iMac and then ordered a replacement from a different vendor. This second iMac isn’t quite as nice as the first one but it also cost less. The overall specs are: iMac 27-inch Retina (Mid-2020) Core i9 3.6GHz – SSD 512 GB – 16GB.
So I get the big Retina display and the i9 CPU. The SSD is smaller, as is the RAM. I can expand storage with external storage. I plan to upgrade the RAM to at least 32 Gb [UPDATE: done], or if it is affordable, to 64 Gb. The maximum RAM capacity is 128 Gb.
Here are the four memory banks, populated with two 16-Gb sticks and two 8-Gb sticks:

Comments after a few days of using the 27-inch iMac
Monitor
Wow! What a great-looking display. I know it probably doesn’t measure up to the latest high-end displays, but coming from the Windows PC world, this display is pretty darned glorious. Shown below is the macOS Tahoe desktop with this newsletter being written in one window and Apple TV in another window.

The screenshot automatically hid the content of the Apple TV window. Interesting.
Audio
The audio is a little boomy for me, but maybe it’s because I’m used to thinner, brighter audio. I’m sure I’ll get used to it. One of the nice things about this system is it includes an old-fashioned 3.5mm audio plug. I get irritated when Bluetooth audio through earbuds or headphones is delayed. Wired headphones should prevent the audio delay that I dislike so much.
Keyboard
The iMac keyboard is a thin thing with a silver metal base and white/ivory chiclet-style keys. Typing isn’t bad but feels different than the keyboards I’m used to (especially my Keychron K3!) because there is very little travel to the keys. I’m not sure I like it, but I’ll get used to it. It is full-sized with a numeric keypad. That’s nice.
Magic Mouse
I am going to have to retrain my brain when it comes to using the Apple Magic Mouse. I’m so used to left clicking, right clicking, and using a scroll wheel that this thing feels very foreign. But it works fine. The problem is my brain, not the equipment.
Camera and microphone
I installed Zoom for macOS and checked the camera. Looks fine. The microphone also captured pretty good audio for a built-in mic.
The Mail app made it easy to set up my Exchange account for work and my Gmail account for personal mail. I’m pretty tickled with how easy that was.
Network
The built-in firewall was off by default. One of the first things I did was enable it.
Operating system
The iMac came running macOS Sequoia. It seemed to run perfectly fine. The display was good and there was not pixelization or other aberrations noted when I tested by opening several windows and watching a video. However, since Tahoe was available as an upgrade, I installed Tahoe. Upon rebooting, the display was really struggling to keep up with changes. I know the upgrade process puts a heavy load on the processor (i9 CPU) and RAM (16 Gb) until all background processes are completed, so I let it run for a few hours.
Thinking it might not have enough RAM, I ordered two new 16-Gb sticks of RAM. First, I removed the two 8-Gb sticks and replaced them with the 16-Gb sticks. The display still glitched from time to time. I added the two 8-Gb sticks back into the mix and rebooted. The display still glitches. This probably means something is going on with the display card. It could be a loose connection, a faulty card, or something I haven’t thought of. So far, it isn’t a big deal, but I’ll look into what it would take to remove the back of the all-in-one computer to get at the internals.
To be clear, I’m now operating with 48 Gb of RAM.
As I’m typing this section, the Colorado HD digital net is going on in the background on my DVMEGA Cast. I can hear Bucky W0SUN, and it’s always a pleasure to hear his voice and learn from his experience. I’m following along in a separate browser tab in https://ham.live.
Eyeball cards and badge arrived
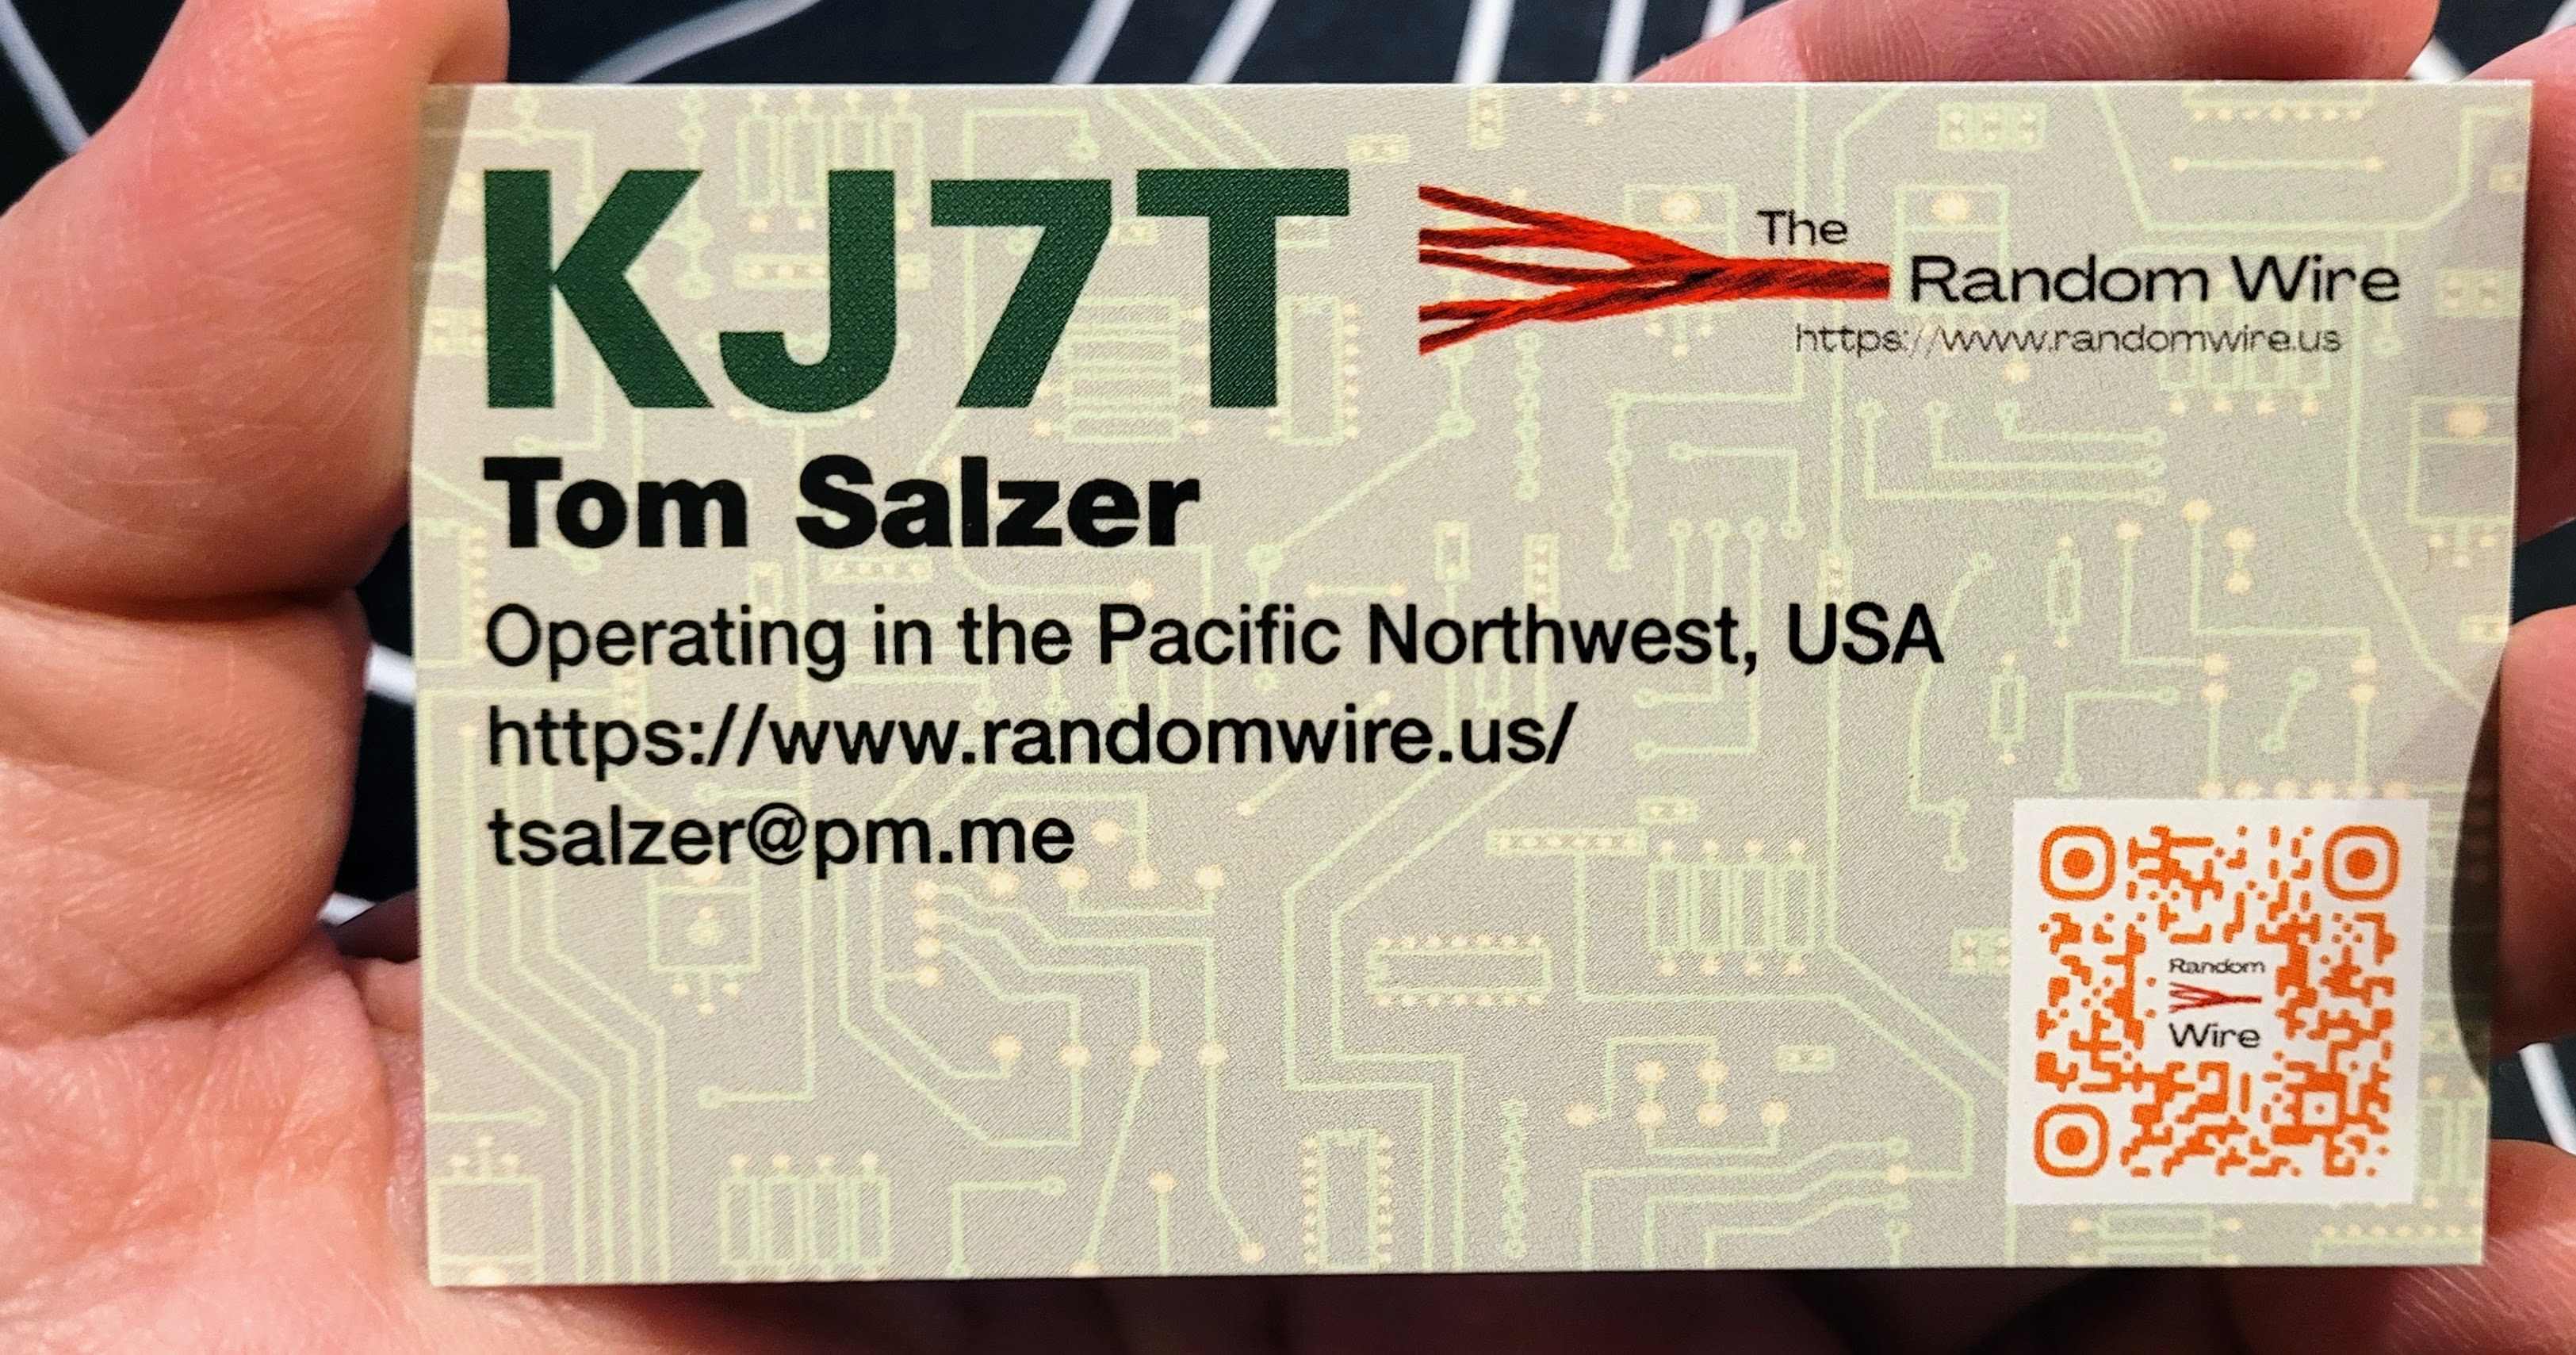
The “eyeball” cards I ordered from Randy Dorman KB3IFH (https://www.kb3ifhqslcards.com) arrived. I showed the draft last week. They look good in my hand. I’m keeping about half a dozen in my wallet so the next time someone asks me about my antenna or my radio, I can hand them a card. The information on the back, as shown last week, did not change.

Here is the content on the back of the card. This is the draft view from last week, so the diagonal watermark is not present in the final version.
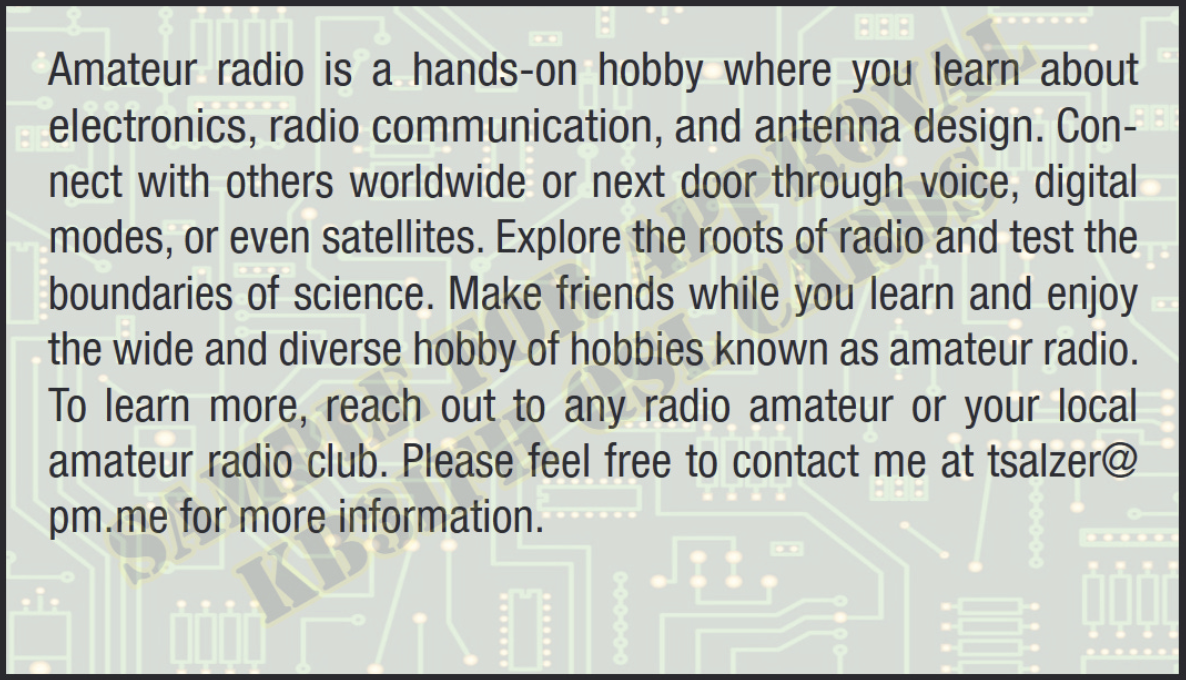
I’m hoping this will be useful. In the last month, several people have asked me about my radio “stuff.” One was a fast-food attendant, a young man who seemed quite bright: “what is the antenna for?” He seemed interested when I described amateur radio. One was a security guard who saw my DMR HT antenna sticking out of my bag: “Is that a radio?” He had a Motorola radio on his belt and I explained that he had much the same technology as my DMR radio, but as an amateur I used different frequencies and more freedom to experiment. He was interested. And a couple of nurses in the hospital have been curious. Now I have a card I can give them that gives them some information and a way to follow up, if desired.
And as long as I was ordering cards, I also ordered a name badge. It is a thick, durable thing. I was surprised and pleased to find it is printed identically on both sides. That solves the problem of the badge flipping to the blank side. I think it looks great.

Closing
COMPACtenna
I’m liking the COMPACtenna on a mag-mount on the roof of my pickup truck. It’s pretty hilly in the glaciated region I live, work, and play in and this stubby antenna seems to be working about as well as my “real” antenna. The big advantage is it fits inside parking garages with 7-feet of clearance. I don’t have to stop and lower an antenna to drive into the garage, or stop and raise it when I leave. In a wider, flatter landscape, I assume I would see more of a difference between the COMPACtenna and the Comet vertical, but my conditions are hills and forests.
A subscriber (thank you, Harry!) suggested the Diamond Antenna K9000TM mount as a solution to my problem. DXEngineering carries it: https://www.dxengineering.com/parts/dmn-k9000tm. I had considered this before, knowing it would be a viable solution. I would prefer to minimize the number of wires I have to pass through door seals and that’s why I opted first for the COMPACtenna on a mag-mount.
Smart home
I’ve wondered if moving toward a smart home setup would make sense. When I saw The tiny smart home sensor that everyone should have (even if you don’t have a smart home), it finally did make sense, especially for my sister’s Lake House. The audible alarm for a water leak would be helpful, but combining that with Home Assistant and an automated alert would be even better. I’ve worried about water leaks since a well-to-do friend had a leak in his vacation home that went undetected for several winter months. By the time it was discovered, the wallboard ceiling panels had fallen and the repair cost was horrendous. Catching a water leak while it is small seems like the right plan.
I went looking for deals and ended up buying this package for $43 with 4 leak sensors included:
This should be pretty easy to implement. I’ll let you know how it goes.
Hospital and health care
It’s been a bit of an adventure this week. My spouse incurred more sensory deficits after her October 13th cerebral hemorrhage. I am hoping she will be discharged to skilled nursing. We’ll see how that goes. It’s also insurance open enrollment time and I’m debating whether to change carriers or stick with what we have. It doesn’t feel quite right to change providers in the middle of my wife’s medical situation. But one thing I’ve learned through this set of experiences is hope and love are what help us keep going, even in the face of seemingly insurmountable odds.
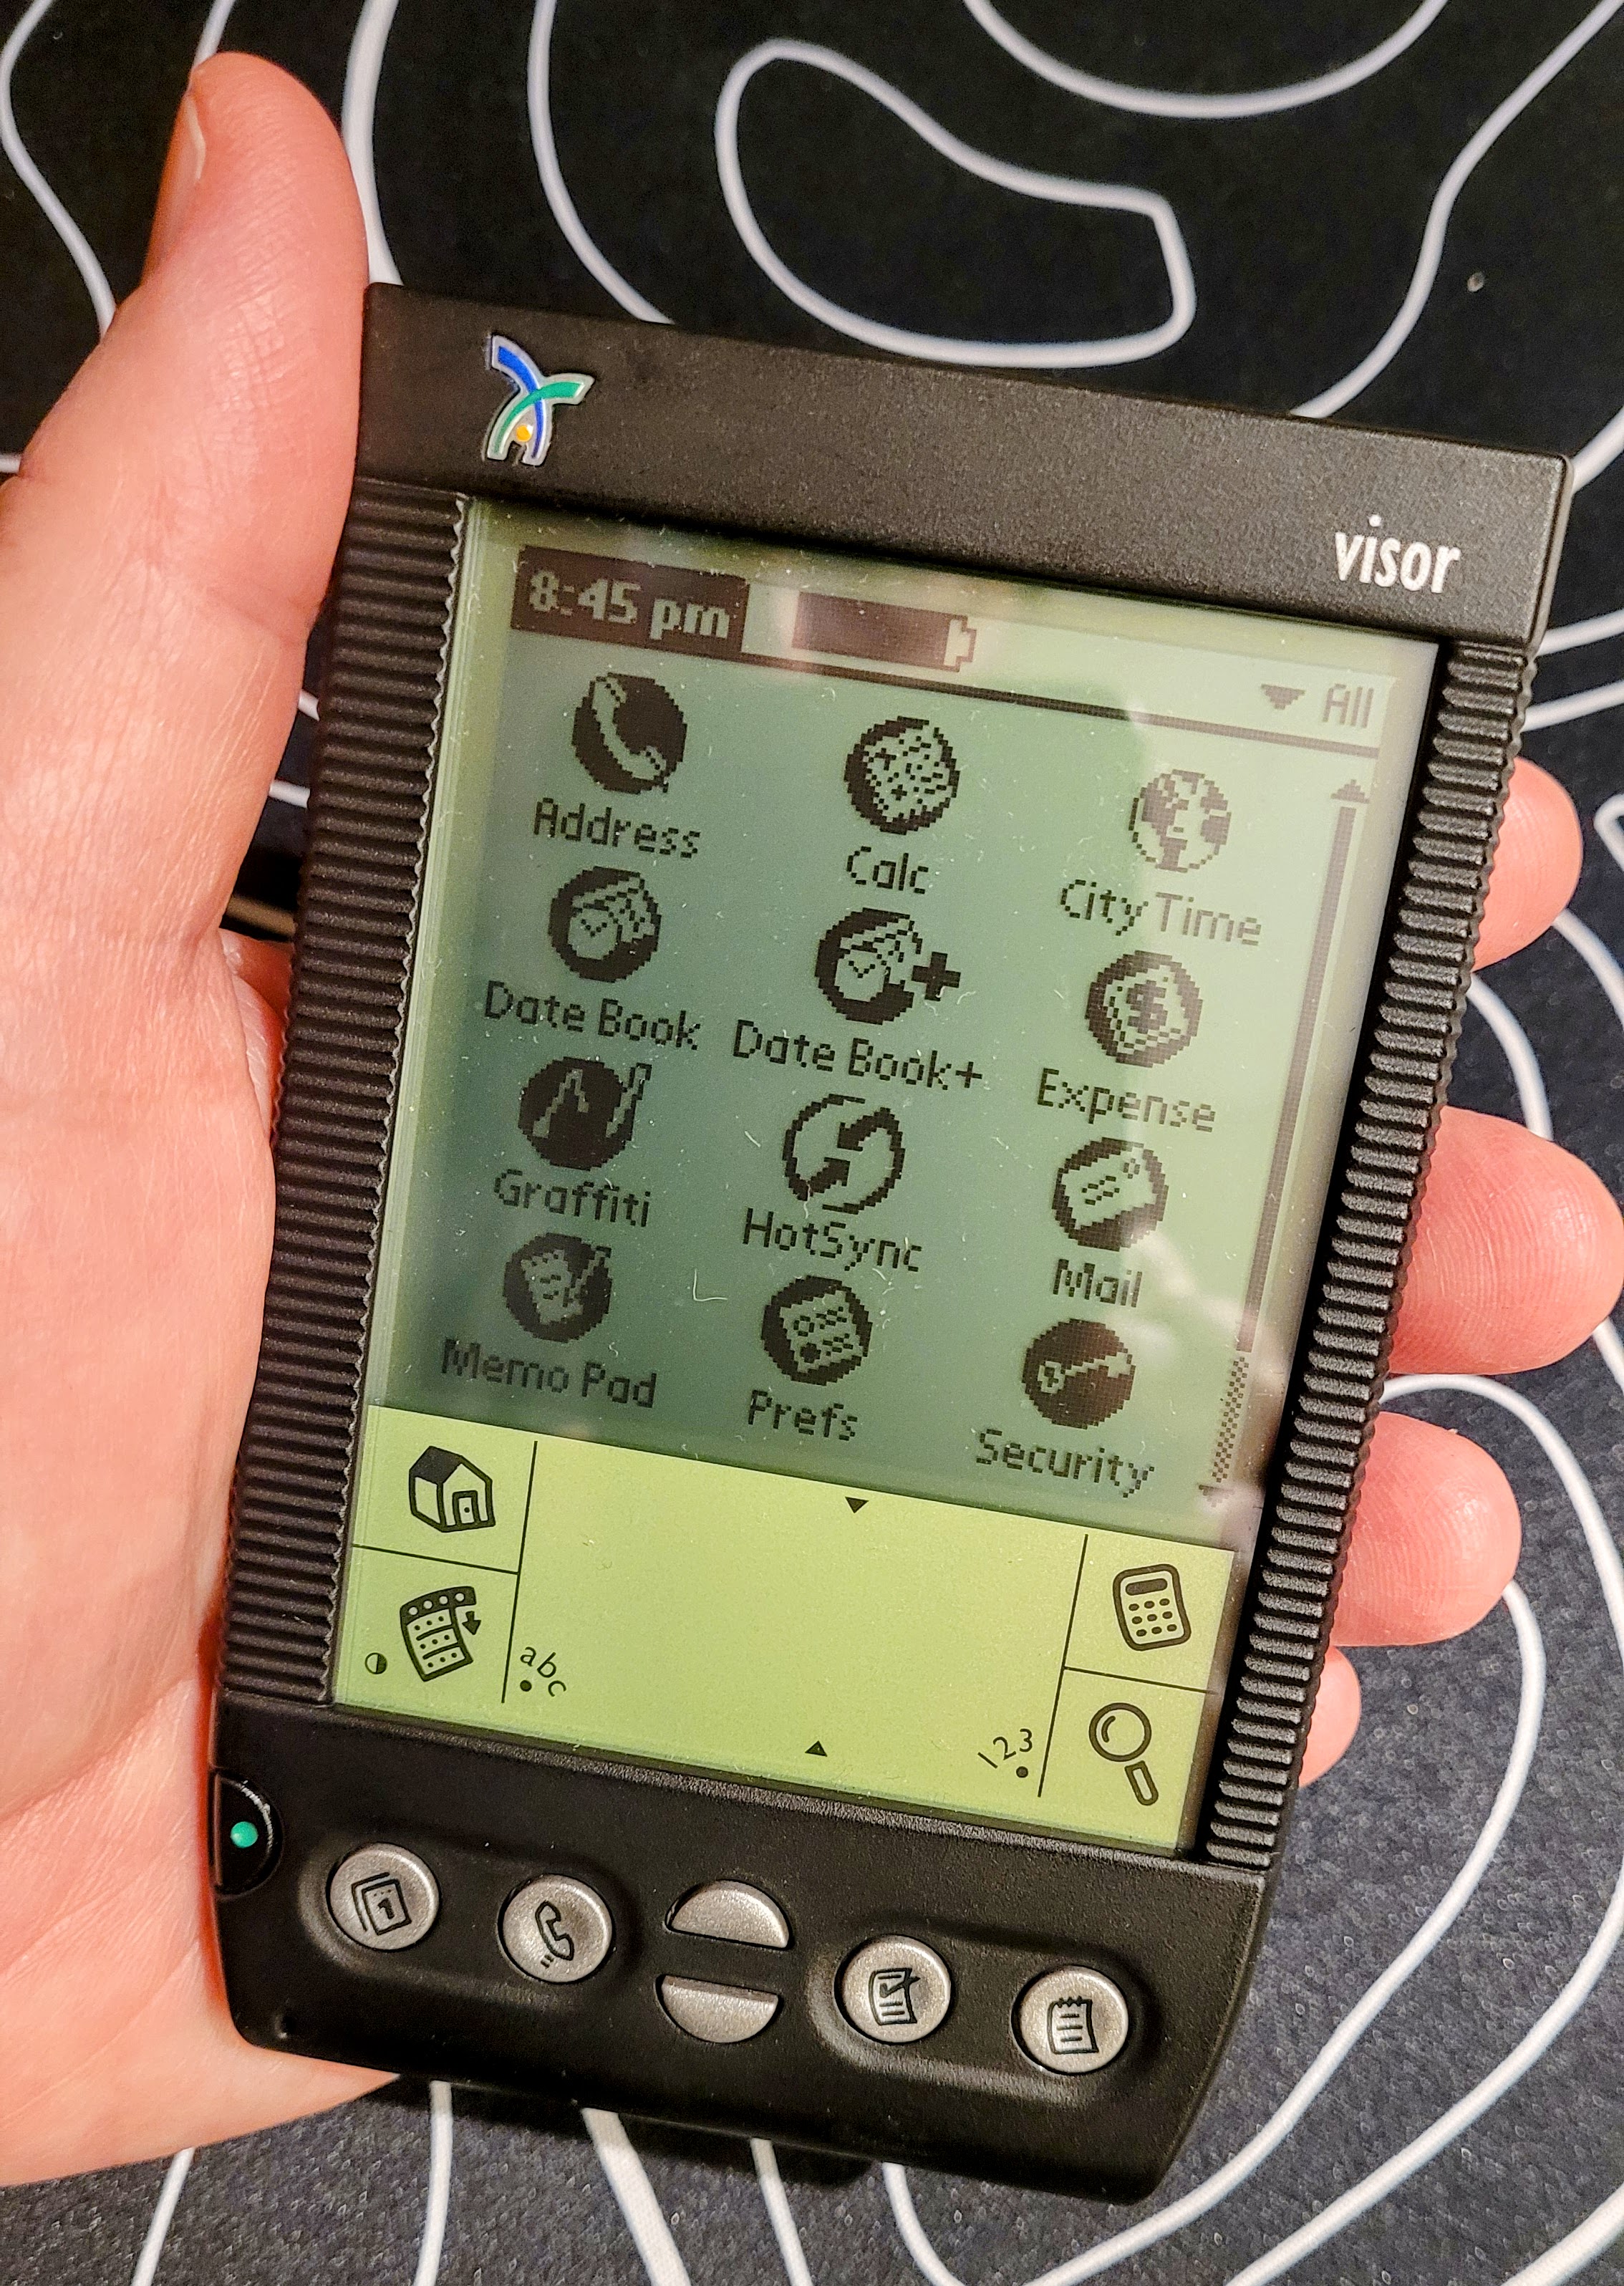
Visor
How about we close this issue of the Random Wire newsletter with something more whimsical and old school? I’m not always all about new technology. I still use this PDA!
Thanks, one and all, for spending some time with this newsletter. Your suggestions and questions are always welcome. Remember to touch a radio every day!
73,


Leave a Reply